Dragon Nest Japan implements region block, so if you live outside of Japan, you will unable to get access the game. Luckily, the VPN will change your IP, and enable you unlock Dragon Nest Japan. Then you need Hangame Japan account. The next thing that you should do is to download and install the game client. This article will help non-Japanese speaking players download and install the game seamlessly.
Download and install Dragon Nest Japan
Step 1 - Register a Hangame Japan account.
Step 2 - Get a paid or free Japan VPN.
Step 3 - Go to the official website of Dragon Nest Japan. Enter your Hangame ID and Password, and then press the LOGIN button.
Step 4 - Click the "Game Start" button. If you get the same pop-up window as above, click はい (YES).
Step 5 - You will be redirected to the Chrome Store automatically. Click the Free button to download and add the PubPlugin extension.
Step 6 - Go back to the Dragon Nest website, and then click the Game Start button again. A User Account Control (UAC) warning message will pop up. Click "Yes" to continue.
Step 7 - Wait for it to finish downloading the files. After the download is complete, the setup screen will automatically open. Click 次 (Next).
Step 8 - Choose a folder to save the game Client, and click "Next".
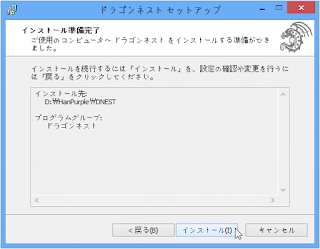
Step 9 - Click インストール (Install).
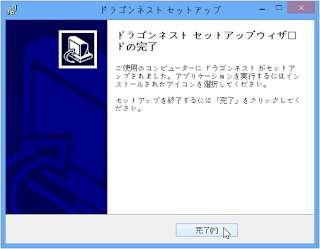
Step 10 - Wait for the installation finish, click 完了 (Complete).
Step 11 - The Dragon Nest Launcher will open automatically. Let it download the patches, and update the game.
Step 12 - Click ゲームスタート (Game Start) to run the game.
How to start play Dragon Nest Japan
Step 1 - The 2 servers are the same, but the one is just a little bit more crowded than the other, that's why its recommended to choose this server.
Step 2 - Choose one of the characters.
Step 3 - Don't forget to choose the correct server at the top right before making the character.
Step 4 - It'll ask you to create a 2nd pin when selecting your character. You can either refuse or make one (highly recommended to make a 2nd pin, to gain more EXP).
Now enjoy Dragon Nest Japan!


